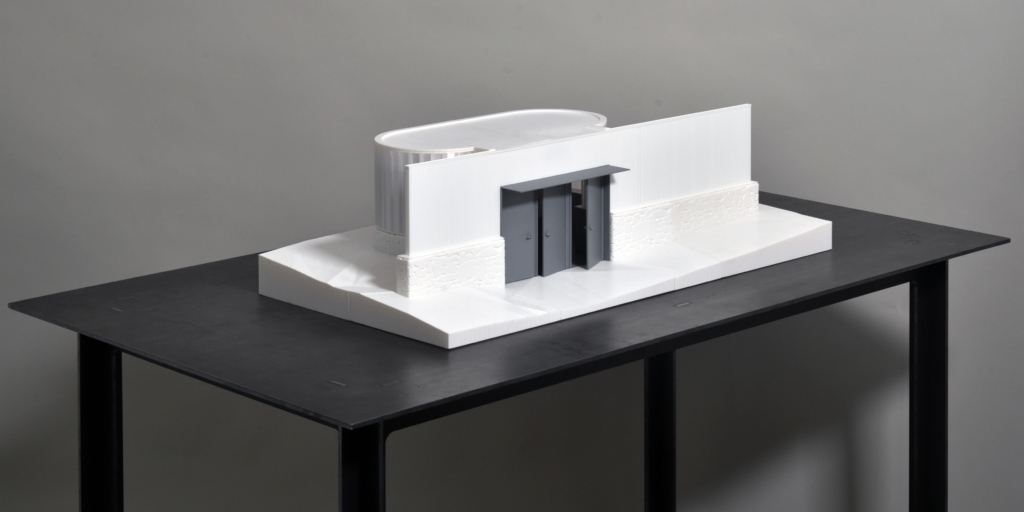
We build physical artifacts for many different reasons. Some might help to place a building within its surroundings to understand contextual relationships. Others might help to reconcile the overall mass of a structure. Models are first and foremost a design tool to communicate an idea. For the competition for a bathroom for the Walter Gropius House in Lincoln, Massachusetts, the design team determined that they wanted a model. At this stage in the competition, the team had already been shortlisted, meaning that no changes could be made to the design; only supplemental work was allowed to be presented to the jury. The presentation would be held in a remote video call. Therefore, this model would not be used in a manner typical of most interview models, which is to iterate and refine design decisions. Rather, its function would be as a tool to communicate the established decisions, both for the jury as well as for our internal office audience. This was also the first competition model that we made entirely from 3D printed filament.
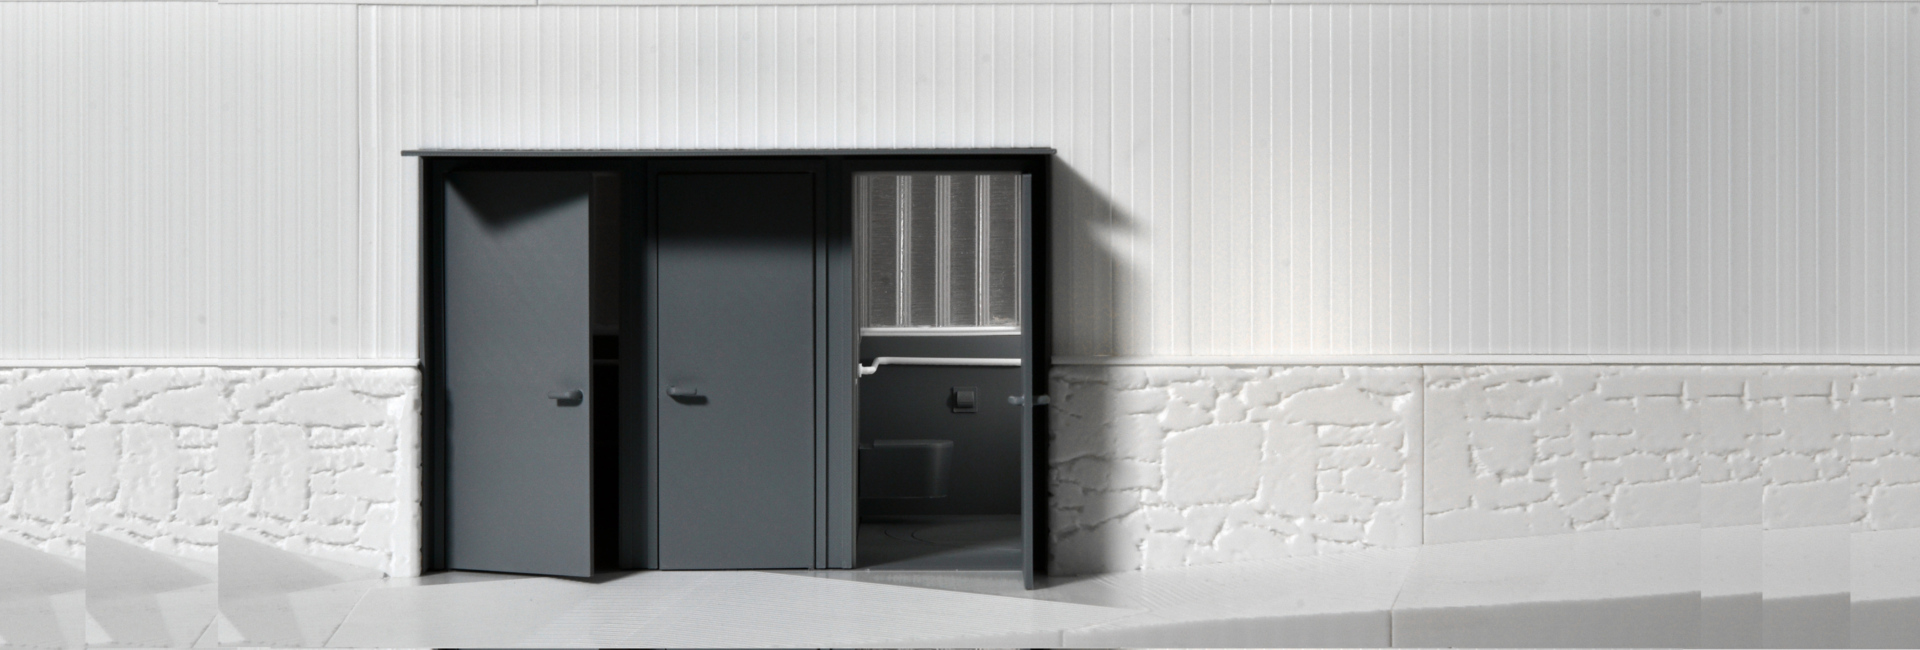
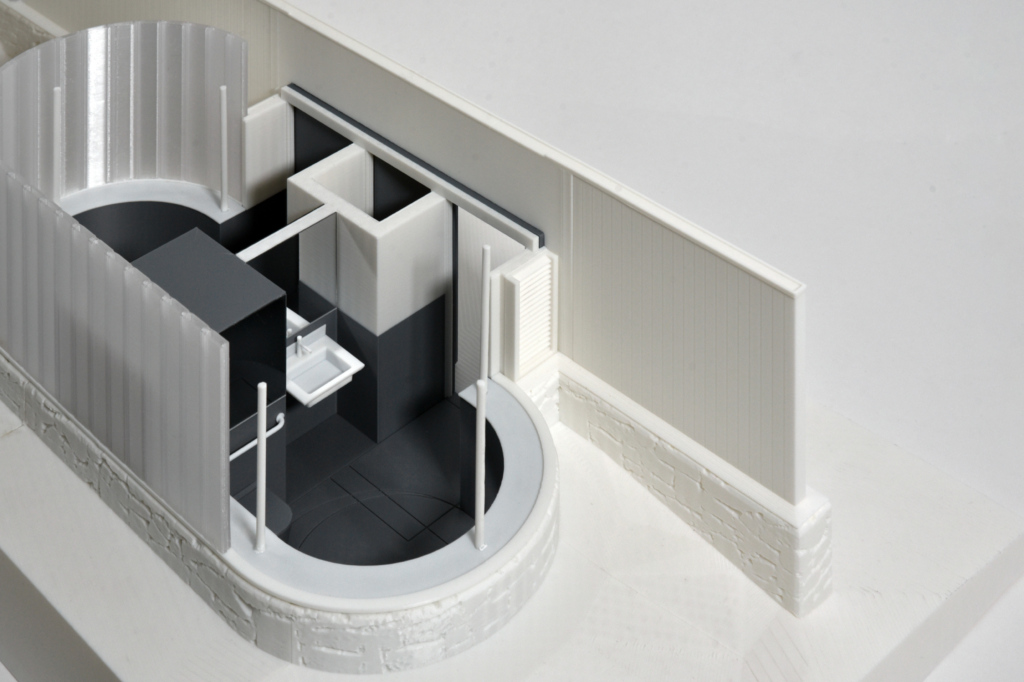
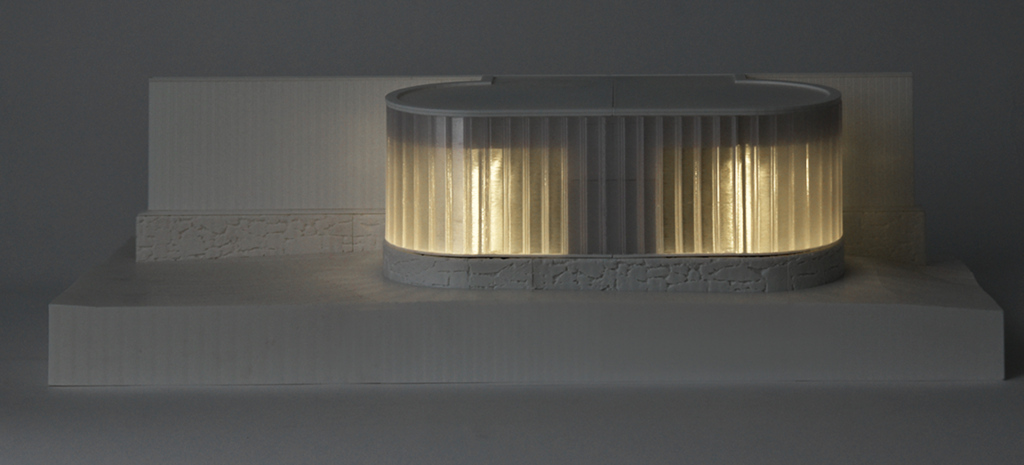
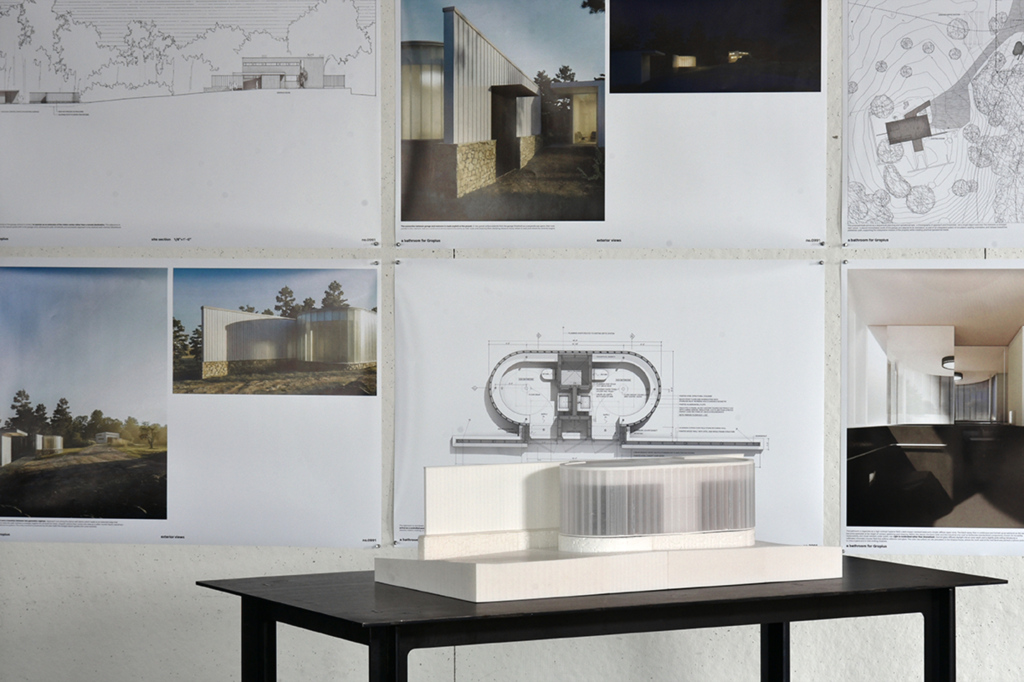
Diagrammatically, the model uses contrast to underscore key design concepts. The exterior of the bathroom structure is represented as white, save for the dark doors and canopy denoting the ingress. The interior is grounded with dark elements below the datum set by the translucent glazing. This is materially communicated through subtle articulation: elements like the partition clad in vertical wood slats, field-stone base and channel glass are abstracted but legible.
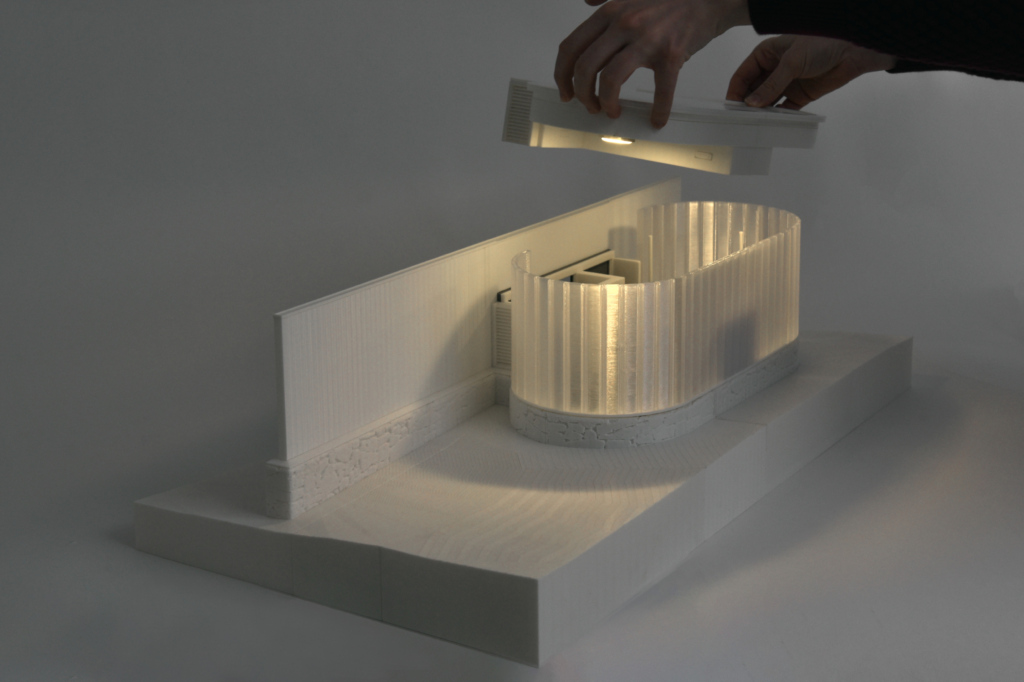
Viewers understand the spatial experience of inhabiting the design proposal: channel glass obscures the interior program while flooding the space with diffuse light. The entrance portals and lower volume of the bathroom form a threshold, compressing the entry sequence and reinforcing a sense of privacy upon entry. The natural light washing the upper volume amplifies the transition from nature to enclosure and enriches the atmospheric quality of the space.
To further illustrate the volume and formal geometry of the structure in relation to its environment and to have a little fun in the spirit of this scaled-up model, we chose to integrate working lights. This was particularly special in allowing us to take night shots.
We usually make physical models for competition with a combination of milled high-density foam and 3D printed components. This is because most interview models we create are relatively flat and encompass a large swath of surrounding contexts. This model is very reserved in its inclusion of context, standing alone along the gradual slope of the landscape. It is highly three-dimensional in this regard and includes details not found in models of a larger scale, such as toilets, vents and door handles. The reason we chose to fully 3D print the model was to achieve these desired details and to maintain a pure form with material continuity. We used three colors of filament: white, dark grey and translucent.
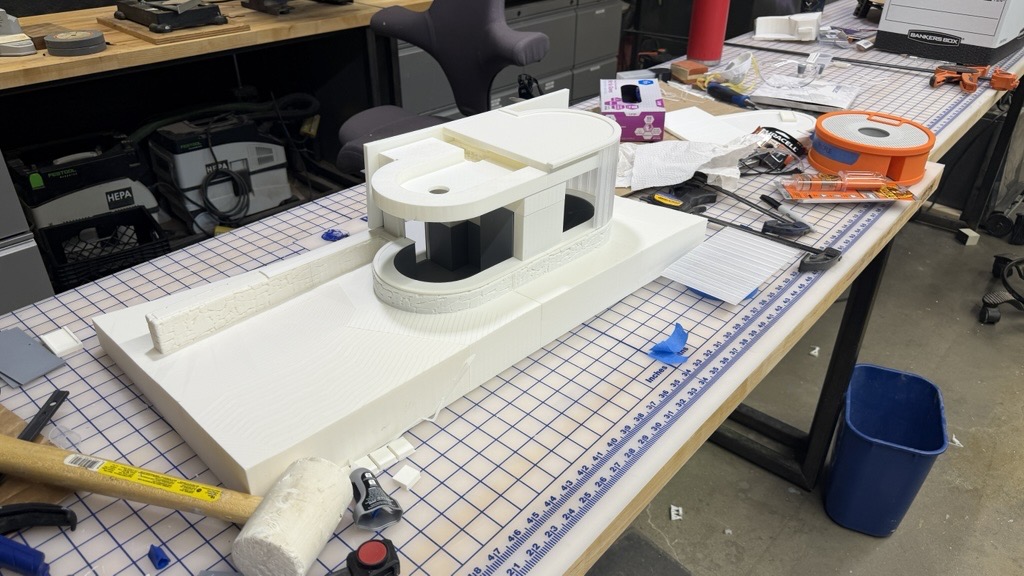
Each of our 3D printing beds is 256x256x256mm. This means that the entire model, whose final dimensions were 10×24”, would have to be printed in smaller sections. As such, every component exceeding the bed limits would be printed as multiple pieces, with the seams disguised as effectively as possible. To have the model broken up by noticeable seams would detract from the craft, continuity and intentionality of the model. The landscape of the model proved to be the first component that necessitated extensive design exploration.
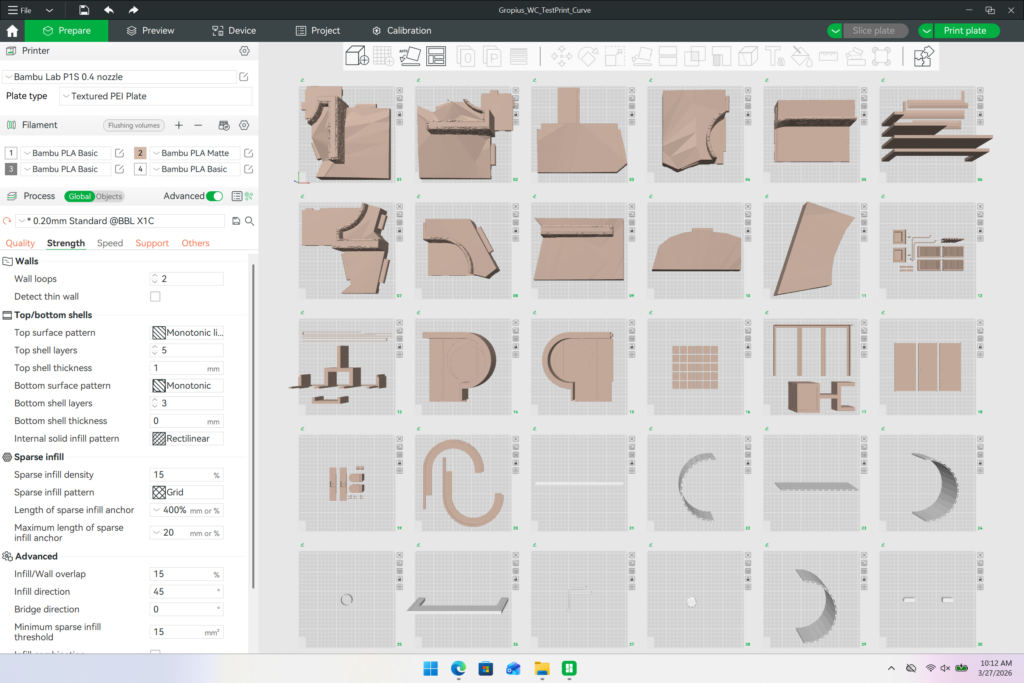
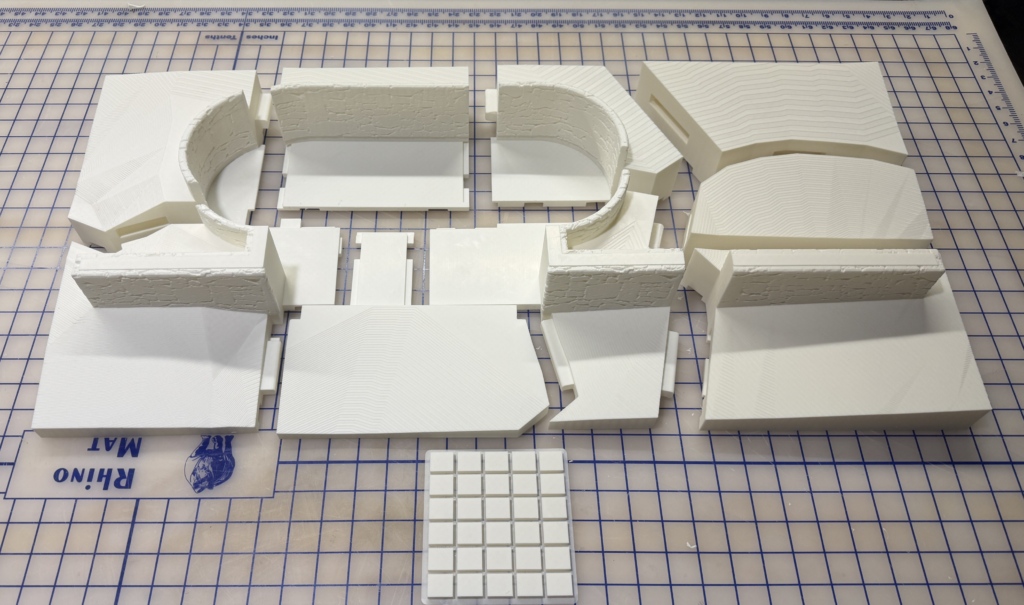
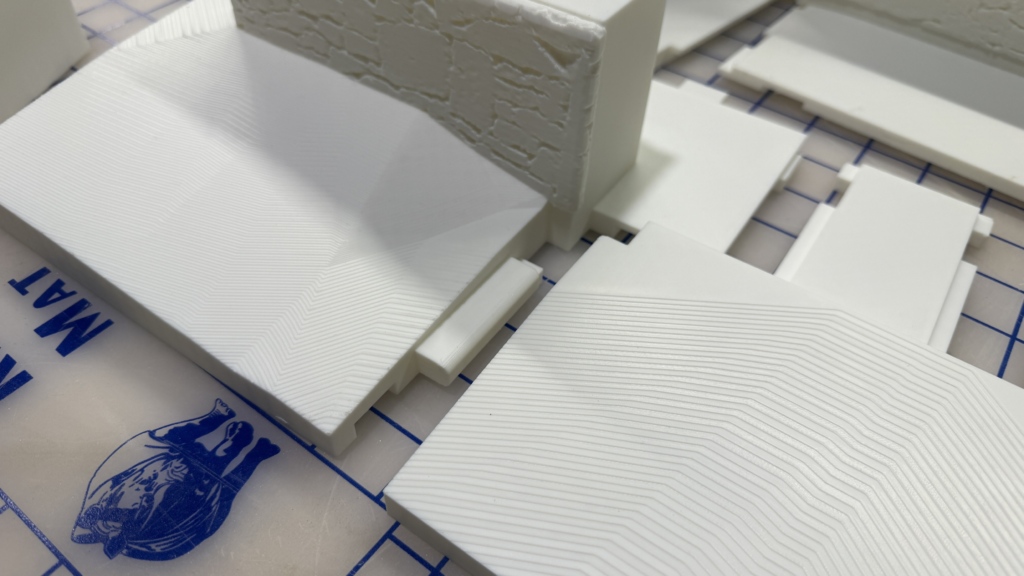
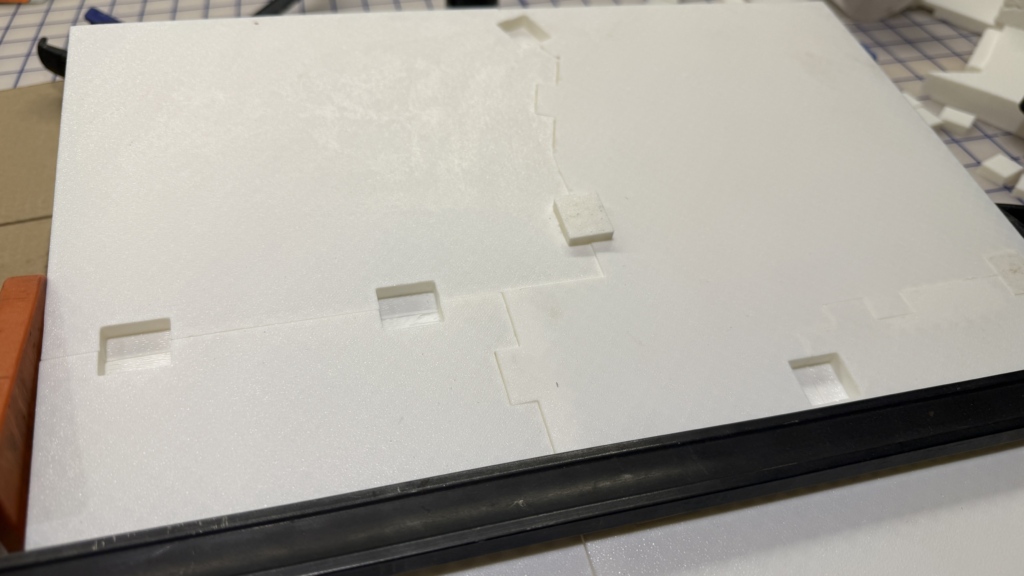
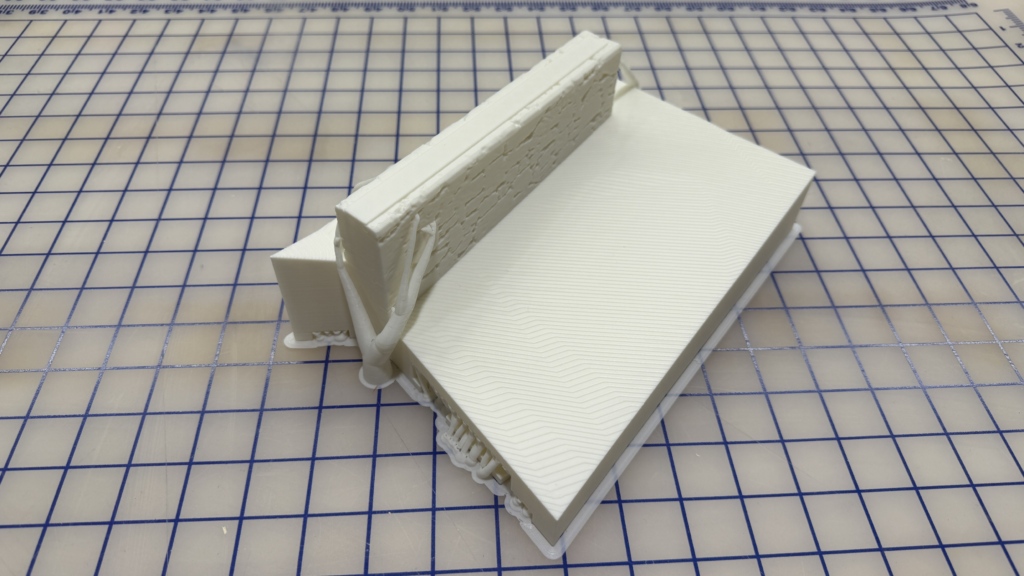
The base is comprised of nine individual printed units, joined with mechanical connections to appear as a solid piece and be robust in its assembly. The geometry received from the design team included a triangulated mesh topography for the landscape. This was fortunate in that it allowed the seams of the model base to align with the tangent edges in the facets of the triangles. Where the base pieces met each other, it was evident that flat planes glued together would not be sufficiently secure to withstand extensive stresses, such as would be found with routine movement of the model or sudden unexpected jolting such as bumps or even a drop. The solution to this was the addition of positive and negative connections, allowing each piece to be slotted into its adjacent neighbors. Beneath the assembly, a series of lips along the flat edges overlap to further secure the assembly. Where two pieces meet, square holes are created which can accept one of the forty printed square keys. This alignment occurs at an angle, such that once the keys are inserted, they lock in the pieces to prevent any movement in a lateral direction between two pieces. Thus, the entire base is robust in its construction and many of the seams can be disguised or placed with intention.
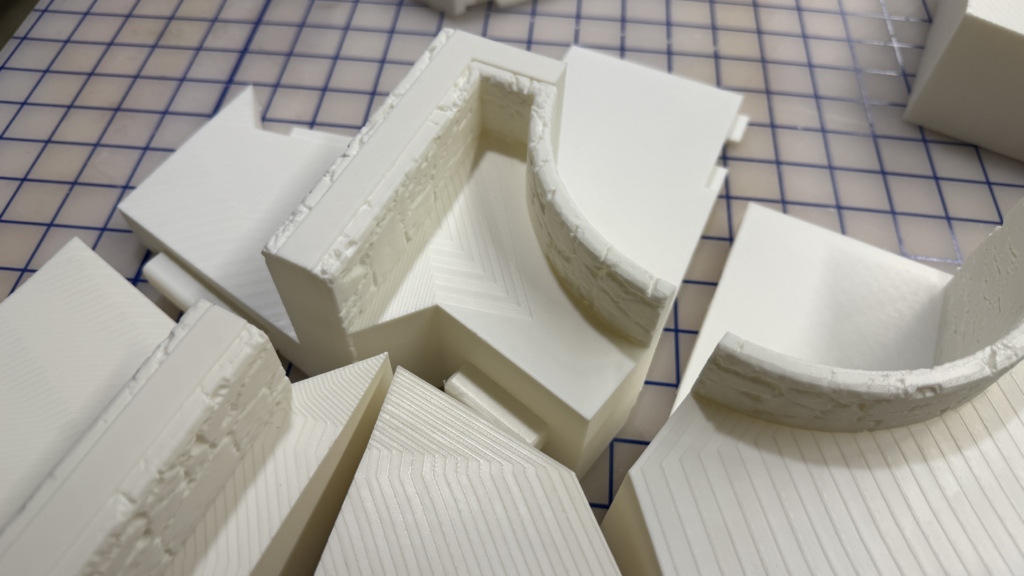
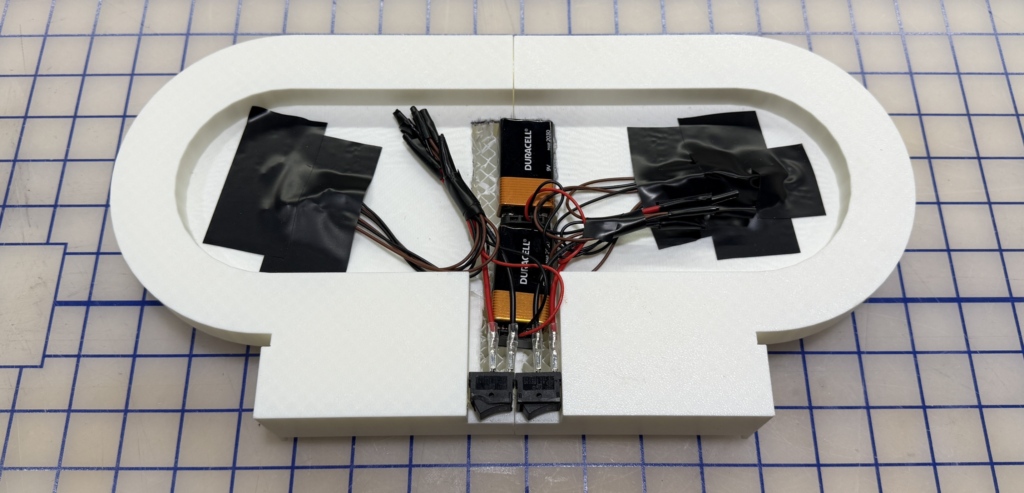
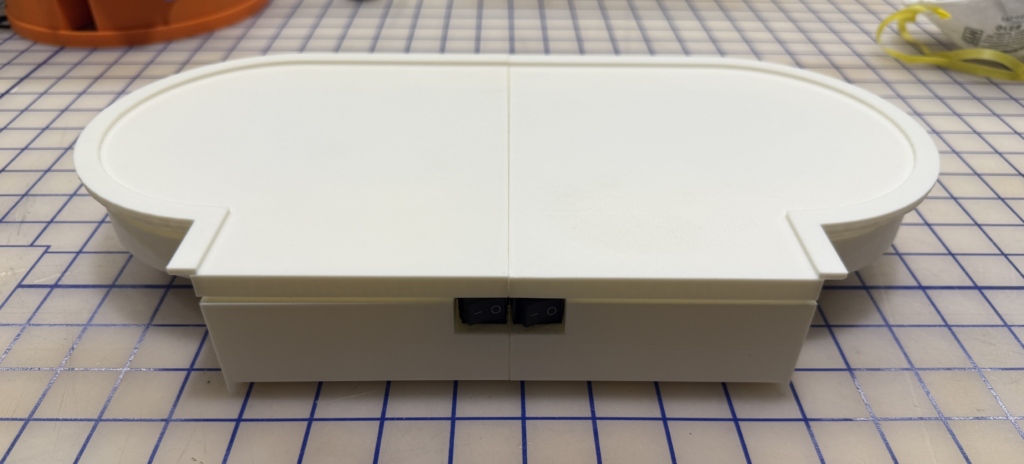
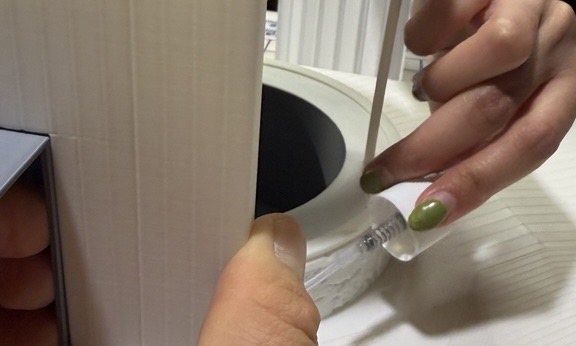
The main building itself is structurally independent from the model base. The intention was for the roof of the assembly to be removable, allowing for access and views of the interior conditions. As with the landscape, determining the split for the roof was an exercise in understanding the key breaks and seams in the form and designing the best way to disguise them. Within the removable roof piece was housed two 9-volt batteries which power the three LEDs that are embedded in each of the 3D printed light fixtures. This also helped determine the break point of the plenum to create the removable roof piece as one unit, as there had to be enough room for the lighting components. The mechanism was integrated by sandwiching the batteries inside the cavity between the roof lid and the plenum below. The pieces of the assembly were hot glued together so that, should the future need arise to replace the batteries, the assembly can be pried open without damage to the material.
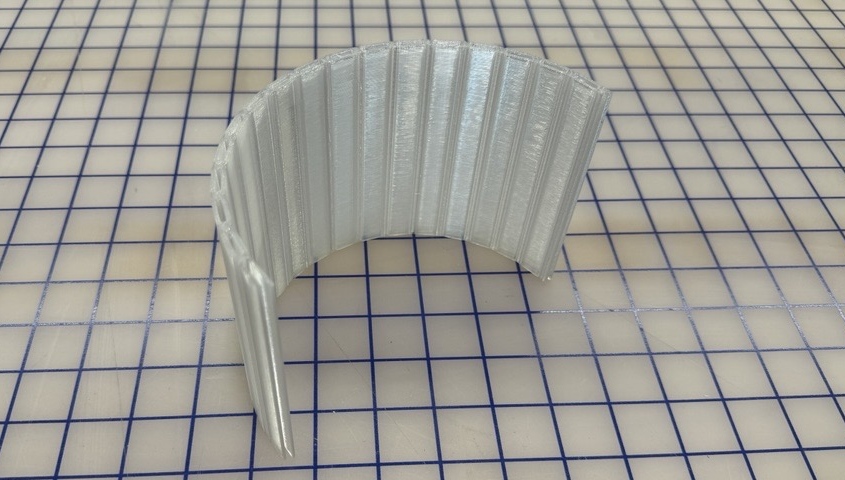
Being an iconic component integral to the design, the methods for representing the channel glass went through several iterations to achieve the desired intent of disguising seams and creating the necessary translucent effect. This property was critical for effectively photographing the model in night conditions. The biggest sticking point was the thickness of the translucent filament. We increased the diameter of the printing nozzle to reduce distortion in the extrusion, as could happen when using finer diameters. The entire channel glass assembly was divided into three pieces. Two were glued permanently to the building, with the third being loose to again allow for closer access to the interior of the finished model.
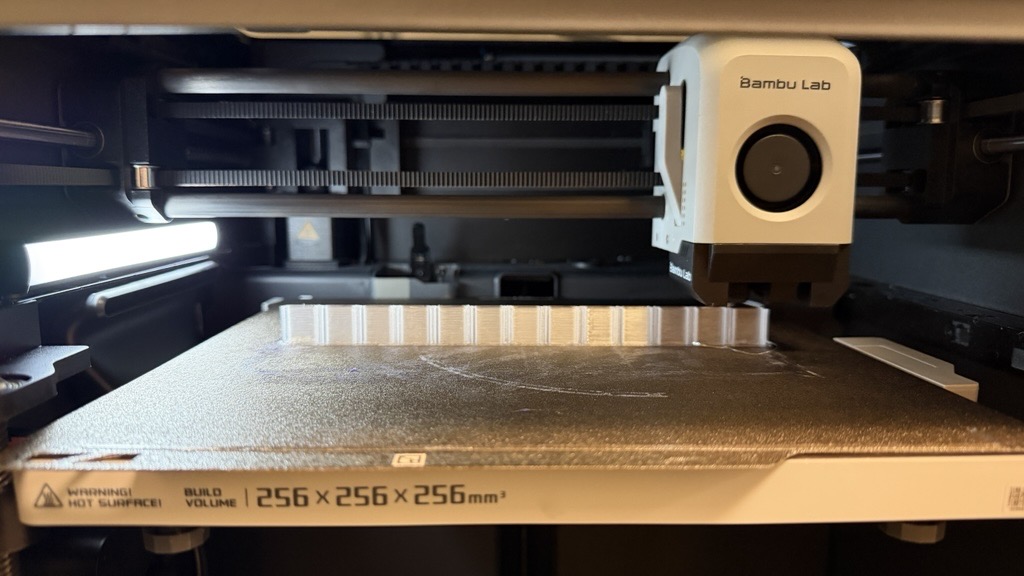
Several other techniques were important to consider when designing this model. For example, because all of the top surfaces were finished with an ironing technique in which the hot nozzle passes over the top surface to smooth it, some distortion can occur from excess melt, most noticeably near crisp edges. Series of testing and accommodation for tolerances had to be done at points where this was likely to occur to ensure that the final product would be printed as intended. Additionally, as is typical of most PLA 3D printing, overhanging elements often rely on some form of support during the printing process. These must be removed by hand and can sometimes detract from the quality of the finished product if not strategically placed. Sometimes, extensive trimming and sanding is required, which can affect the finished surface and in extreme cases can even be more work than redesigning the model and printing again. This was especially an important consideration for the base of the model, namely the negative voids and deep overhangs. The pieces were designed to slot together tightly enough to be structurally sound, yet easy to assemble without extensive post-printing interventions (i.e. grinding/sanding).
At our core, we are a design practice, and cultivating and evolving in this practice demands dedicated attention to our craft and an embrace of our design principles at all stages, be it for an existing client, an academic studio or for a design competition. Though it would be simpler to show renderings during an online presentation, we chose to build this model because we are rigorous in our design ethos. We care about the details and are competent in our ability to design and express them. The decision to invest the time and care required to design this piece was never a question of whether, but rather how. It presented an opportunity to further refine our argument, communicate our design intent with greater clarity and challenge ourselves to develop new processes while expanding our technical and representational skillsets.
Part of being in our design collaborative means that everyone at the firm can share in all aspects of our work, and this project was no exception. When giving a dry run presentation to the broader office prior to the interview, the design team was able to cultivate engagement and gain new perspectives, in part by having the model available as a discussion tool. Some ideas cultivated at this event were then applied to further refine the final presentation. Physical artifacts are a testament to our priorities as a design and research firm and are one of many tools in our arsenal that bring a project from a concept to a fully formed proposal. An integral part of our methodology, this model demonstrates how we develop our work and the various approaches we use to optimize communication across different contexts and media.


From milling to installation: a new feature wall for Breaktime.
This branded feature wall is the first installment of our work for the Breaktime Hub, a resource center in downtown Boston where young adults experiencing housing insecurity can access health services, job training, basic necessities, and shelter.
The custom-milled MDF panels echo Breaktime’s logo while doubling as ledges for photos and personal objects. We’re thrilled to continue our work with Breaktime and look forward to the next installment of custom architectural furniture for the Hub.
#designalways #fabrication #artofmaking #boston #architecture